We have a Labor Day Cookout on Monday that we are invited too, and I thought that would be the perfect crowd to test my cake pops on! I thought since we are in September, I would opt for a FALL theme, and I picked out sprinkles and chocolate based on that theme! I had a LOT of fun shopping for the "goodies" and I had some help from my wonderful friend, Stacy!
In preparation for today's activity, I set out 3 eggs and a stick of butter last night, which is simply what the cake mix called for! I chose yellow cake, and went with a Betty Crocker Super Moist Butter Yellow Cake. I chose Betty Crocker Whipped Butter Cream Frosting to mix into the cake, after it cools of course!
I also selected Wilton Candy Melts to coat the cake pops with in red, orange, and brown.
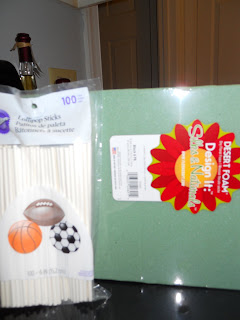
I got coordinating fall colored sprinkles, 6" lollipop sticks, and floral Styrofoam blocks.
I purchased green Styrofoam over white because of the price difference, but I decided that I would wrap my blocks with scrapbook paper, so created a little display for the cake pops!
BAKING THE CAKE
I baked the cake according to the instructions on the box. It called for
1 Cup Water
1/3 Cup Butter
3 Eggs
Cake Mix
I mixed everything in the mixer...
Poured into a 9x13 glass baking dish, and baked for 30 mins...
I am sure that bake times will vary with different ovens, but I used my cake tester in the center of the cake after 30 minutes, and it came out clean!
Yummy!
Making the Cake Balls
After allowing the cake to cool completely on a wire rack, I crumbled it into a bowl and added half of the can of frosting to start. Bakerella says to use the whole can, but since I used Super Moist cake, I started light and added as needed!
I used my hands to mix it all up, and it was messy!
After mixing the cake and frosting, I rolled into balls...
...and placed on a plate covered with wax paper.
I placed the plate in the freezer for 30 minutes to allow the cake balls to get hard and ready for chocolate coating! I inserted the lollipop sticks into the cake balls before I put them in the freezer. I thought it would help the cake adhere to the sticks a little bit better.
Adding the Chocolate Coating
I melted my first color of chocolate, orange in the microwave. As much as I would LOVE to have a Double Broiler... I do not own one, so the microwave would have to work...or so I thought! I melted in 30 second intervals, at half power, so I wouldn't burn the chocolate. I stirred between each 30 second interval. And the chocolate never got to a liquid stage. It made more of a "frosting" :(.
So, Derik rigged me a double boiler, and we tried another method! The chocolate was still not melting enough, so we added some water to thin it out. I would have added milk, but we (of course) ran out this morning!
When the chocolate was smooth I rolled the pops in the chocolate and covered in sprinkles!
I repeated this process with the other 2 colors, and when they were all finished... I allowed them to dry before tasting! Working on my last color...
My final product wasn't as pretty and "finished" looking as I was hoping, but anyone who knows me knows I am a perfectionist! So... for my first attempt at this... I will take a B- and be proud of it!
WARNING: I will warn anyone who wants to try these delicious little treats... its an all day ordeal! Make sure you have plenty of time! I started this process around 9:30am this morning and I am finished at about 2:15 this afternoon! Allow yourself enough time (and include some "test" pops!)
- Jessica


Good job! I used to frequent Bakerella's site, but eventually realized that I didn't have the patience to make the things she makes. She does have some really cute things though.
ReplyDeleteThanks Melissa! I tested out, to see if this is something that I would make at Christmas, and after the test... that idea was vetoed!!!
ReplyDelete